While the Minecraft Launcher is an important part of the game, sometimes it can be a pesky update that keeps you out of the game. And since it’s software that’s entirely different from Minecraft, it is often updated before players can continue playing the game.
Once the Minecraft Launcher is updated, you’ll need to restart it before you can enjoy the new version. So in this article, we’ll be guiding you on how to restart Minecraft Launcher to Update.
How to Restart Minecraft Launcher to Update
After the developers have updated Minecraft Launcher, players will instantly see a message in the top-right corner of the game that notifies them of a ready new Launcher update. It will also tell you to restart the Launcher in order to use the latest version.
If you attempt to play Minecraft without first updating the Launcher, you will get an error message that says, Outdated Client. This leaves you with only one viable option for fixing this: Restarting the Launcher and applying the updates.
Restarting the Minecraft Launcher
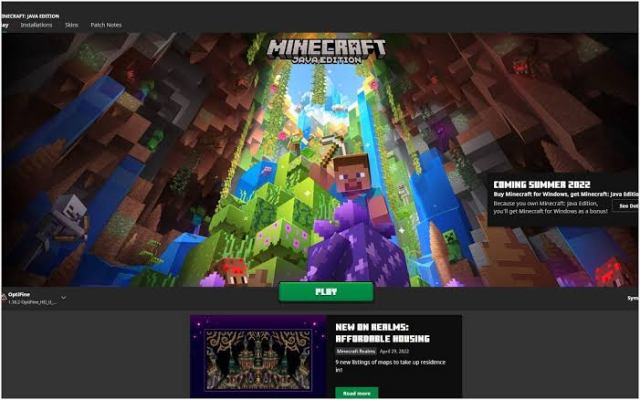
The easiest way of restarting the Minecraft Launcher is simply by closing the software and reopening it. Although more often than not, this might prove unsuccessful and you will see the restart notice in the top-right corner once again.
So to restart the Launcher, you’ll need to fully close down the program and then reopen it. You can do this by pressing Alt+F4 which commands the Windows Task Manager to force close the program. Afterwards, you can restart your computer.
Doing either of the aforesaid will close the program completely and whenever you reopen the Launcher, you should have the latest version running and then the restart notice should no longer be visible in the top-right corner.
This method is guaranteed to work for the majority of users but if for some reason it doesn’t work for you, then you’ll have to undergo the process of deleting and reinstalling your Minecraft folder.




Published: Jun 7, 2022 11:51 am