Pim the little rabbit is on a quest to become the world’s best salvager! With the help of his brigade and you of course, he is on his way to conquering the skies! Enter BattleSky Brigade: Harpooner, a new entry into the BattleSky Brigade series. Fly through action-packed shoot ’em up stages and, then return to the battleship collecting all of the treasure left behind!
In our BattleSky Brigade: Harpooner tips and tricks, we will go over the basics of being the perfect salvager. BattleSky Brigade: Harpooner has a lot of interesting mechanics you do not normally see in arcade shoot ’em up games, so we will explain the in’s and out’s of the game. Let’s get started with our BattleSky Brigade: Harpooner tips and tricks strategy guide to salvaging lots of loot!
Salvaging 101
Pim and the brigade will begin the journey in Smoland, the home cluster of Wyldes (floating islands). All Smolians live here, and this means that the skies are relatively clear.
Swipe up to launch your ship into the sky! You can drag anywhere to move your ship, but as long as you ship is moving it will not fire. To fire, simply let go of the screen and your ship will automatically start firing.
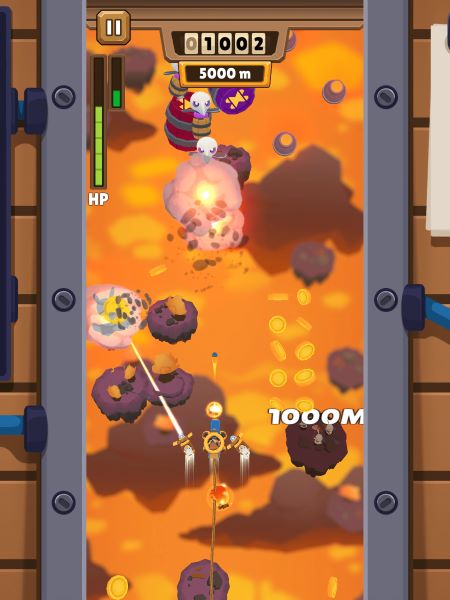
Your goal is to destroy as much debris and enemies as possible. When something is destroyed, it will leave behind gold and materials. However, you cannot collect your spoils right away – see that counter at the top? Your ship will fly that distance, and once you hit it you will automatically deploy your capture net.
The rope tied to your ship will start to reel you in, and you will begin to move backwards through the level. This is your chance to collect all of the goodies floating around! Simply move your net into the item to capture it. There is a limit to the amount of gold you can carry, but you can improve it later.
Be warned – if your ship runs out of armor during a run, you will immediately enter pull back mode. If you take any further damage as you are being reeled back in, you will lose gold and materials you collected from your net. Try to avoid taking too much damage!
Choosing a Ship
With your haul pulled into the cargo bay, you can now spend it on all sorts of ship upgrades. There are plenty of upgrades to go around, so we will break it down for you here!
The first kind of ship upgrade… is a whole different ship! Your starter ship, the “StartaPod”, is a balanced ship with good agility and health. You can upgrade it further to increase its health, as it is a perfectly good ship to continue using. If you are looking for something a little more specialized, there are lots of other ships for you to buy.
The “Frame-Free” ship has absolutely no health, but it has maximum agility, making it the fastest ship in the game. If you are absolutely confident in your piloting skills, you can take this ship for a ride and feel the extreme speed!
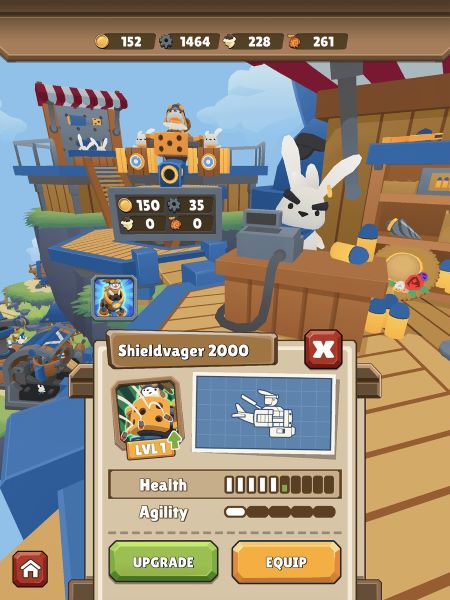
The “Shieldvager 2000” is the slowest but sturdiest ship in the game, making it perfect for those who like to rush into the thick of things. The “Magnacraft” is a relatively weak ship with low health and agility, but it comes with a built-in magnet to attract goodies naturally to your ship.
There are other ships to discover, but the most important thing to keep in mind is that they all have their own strengths and weaknesses. Pick the ship that suits your playstyle the best and get to the skies!
Choosing your Weapon
There are three other ship categories that you need to consider as well: weaponry, wingmen, engine, and of course your rope and nets.
Your ship can only equip one gun at a time, and just like the ship types each gun has its own strengths and weaknesses. The “PeaPod Plonker” is your starting gun and it fires weak pellets forward but at a fast rate. If you upgrade it the damage will increase, making it a simple but reliable weapon later on.
The guns for close-range, long-range, and technical playstyles. The “PoofyPod Plonker” is basically a shotgun which deals more damage if all pellets hit, while the “Penetrata” fires weak, long-range bullet that pierces through enemies. The “Spreadshot Spewa” fires weak bullets in a wide arc rapidly.
There are lots of choices here, but you want to pick a gun that compliments your ship-type. If you use a speedier ship, then a close-range weapon like the PoofyPod Plonker might suit you well since you can get up close to enemies and get out before it gets too dangerous.
Choosing a Wingman
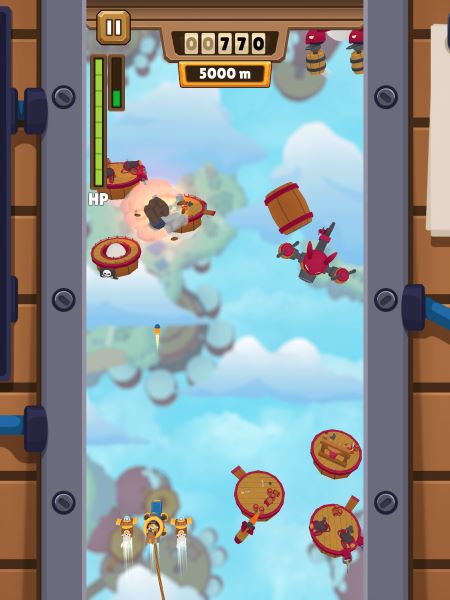
Your next ship option to consider is your wingmen. You do not start out with wingmen, so the first one must be purchased manually. When you have wingmen equipped, two mini ships will fly around your ship. Each wingmen does something different! Keep in mind that your wingmen have their own health bar, and they can take damage just like you do. When they lose all health they will evacuate and you will be left alone!
The basic wingman is the “Not-So-Trusty Sidekick”, which fires off periodic shots forward. This is helpful for taking down enemies and threats faster, whereas the “Baddie Blocka” will act as a shield and absorbs some hits for you.
For general purposes, having the sidekick is a good way to add additional firepower to your ship. You do not need to worry about blocking any hazards if it is destroyed! Our second favorite wingman to use is the “Grabby Klaws”, which activates on your return trip. Your wingmen will grab nearby gold and materials with their claws, helping you collect more goodies!
Other Ship Components
Your rope can be upgraded to increase the distance your ship can fly, while your net can be upgraded to increase the amount of goodies it can hold. Each component should be upgraded as you are able to! This will ensure smooth progression.
One more category are the ship parts. These extra parts unlock new areas for you to travel to, and you cannot play in the area until you purchase the respective part. For example, if you want to fly in Chilla, you will need the Radiator to prevent your ship from freezing over!
Check the Smolpedia for Progression
After a couple of runs, the shopkeep will task you with find two special parts that can only be found at the end of the Flamelon Farm and the Chilla. First off, this means that you will need to upgrade your rope so that you can even reach that distance.
Progression in this game is handled solely through these quests. If you are unsure of what to work towards next, take a look in the Smolpedia. The first tab are your quests – completing these will unlock new areas to explore, new parts to buy, and new mechanics to play with.
The second tab is full of achievements. Whenever you complete an achievement, you can come here to claim your prize, which is usually a small amount of gold. It is better than nothing though!
Piloting Tips
Now that you understand the main gameplay loop of BattleSky Brigade: Harpooner, we can give you some tips on how to enhance your flying skills.
Remember to take out obstacles and hazards as soon as you see them. The sooner you deal with a hazard, the more space on the screen you have to work with. As soon as you see an explosive barrel or a mine (ESPECIALLY mines!), immediately try to take it out provided you are safe to do so.
Watch out for the indestructible islands. These things serve as barriers and obstacles that you must fly around. The game loves to throw more enemies at you as you are maneuver, so be on a lookout for those warning indicators that enemies are about to spawn in that spot.
Head Into the Maelstrom For Easy Farming
Once you unlock the first set of new levels, you will also unlock the Maelstrom, the swirling vortex in the center of the sky. To access the Maelstrom, you will first need to purchase the Homing Engine to allow you to navigate the Maelstrom’s unstable airspace.
The Maelstrom is different from the other levels; firstly, it is endless and it will continue to go on until your ship is too damaged to proceed. Secondly, you start your flight in “loot” mode already!
The way this works is that you have a mini black hole trailing you the entire flight. If any gold or materials fall into the hole, it is permanently collected and added to your inventory. If your ship runs out of health, your flight will end on the spot, and you will not be pulled back into the brigade.
Instead, you will just reappear back in the launch bay with whatever goodies you managed to collect. Due to its endless nature, the Maelstrom is the perfect place for farming up gold or other materials you might need. Just make sure your ship is outfitted for the long run and you should be able to pull in a good haul.
That’s all for BattleSky Brigade! If you have any other tips or tricks to share, let us know in the comments below!






Published: Mar 25, 2020 05:40 am