Despite amassing $800 million in the first three days of its release, Activision’s Call of Duty Modern Warfare 2 isn’t without its problems. Financially, the game is a significant success for Infinity Ward and is now the biggest-selling game in the CoD franchise. No surprise there!
However, a lot of players have been reporting multiple bugs and issues associated with the game. And although the developers have been making plenty of efforts to solve most of these issues with updates, these updates often come with bugs of their own. So here’s how to fix error code blzbntbgs00003f8 – MW2.
How To Fix Error Code blzbntbgs00003f8 – MW2
Like many other error codes that have frustrated players of Modern Warfare 2 lately, the blzbntbgs00003f8 error code is one that has affected players in not only Modern Warfare 2 but also in Warzone and Black Ops 4, making it a universal problem across different Call of Duty games.

Luckily, the error only occurs in multiplayer modes of the aforementioned games and below we’ve outlined a number of methods that players can use to try and the blzbntbgs00003f8 error code in MW2.
Check your Internet Connection
This one’s a no-brainer and is probably the first thing you ought to do in such a case. And since the issue only affects multiplayer, chances are your internet connection is unstable. So do run a check on your WiFi or other ways you use to get an internet connection and be sure they’re stable and working fine.
Play With A VPN
A simple cause of the blzbntbgs00003f8 error code is that your computer/PC might be having difficulty accessing Activision Blizzard’s servers in order to access the multiplayer features. In this case, you can try using a VPN to bypass the blzbntbgs00003f8 error code.
Changing Your DNS Server
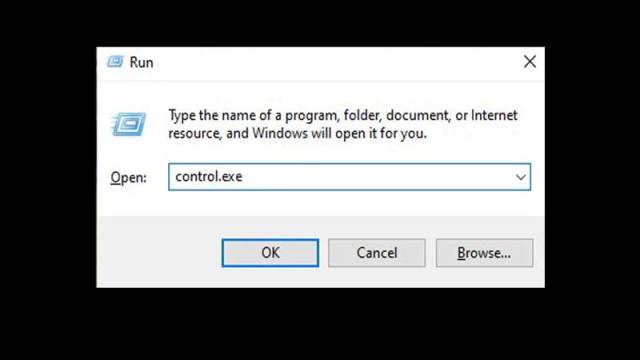
This is easily one of the most popular ways of fixing the blzbntbgs00003f8 error code and you can do this by opening the Run dialogue box in Windows by pressing the Windows and R keys together. Once the box appears, type in control.exe inside the text box.

Afterwards, press the Enter button and it’ll open up the Control Panel. Now go to the Network & Sharing Center which will take you inside the Network Connections menu. Here, you need to right-click on your current network. From the resultant dropdown list, then click on Properties.
Now go to the Networking tab, then click twice on the Internet Protocol Version 4 (TCP/IPv4). Inside the screen, you’ll have to make sure you enable the box next to Use the following DNS server address. Upon doing that, be sure to set 1.1.1.1 as the Preferred DNS Server and make 1.0.1.0 as the Alternate DNS Server.


Published: Dec 27, 2022 01:44 pm