Villages are important in your journey through Minecraft, as they provide you with an outlet for trading and give you access to some easy resources. If you want a head start in your world, you can use an external tool to find a Village easily in your world. Today, we’ll teach you how to use a Village finder in Minecraft: Bedrock Edition!
How to Use a Village Finder
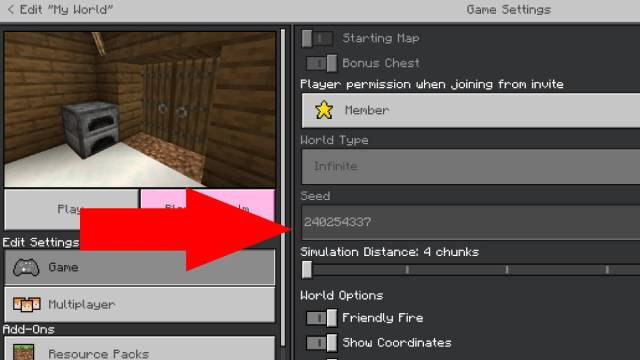
Today, we’ll be using the popular Chunkbase Village finder, available on the Chunkbase website. Before you head there, you’re going to need the seed for your world, which should look like a string of numbers. You can see your seed in the world details after you’ve created it.
Related | How to Download and Play Better Minecraft Modpack
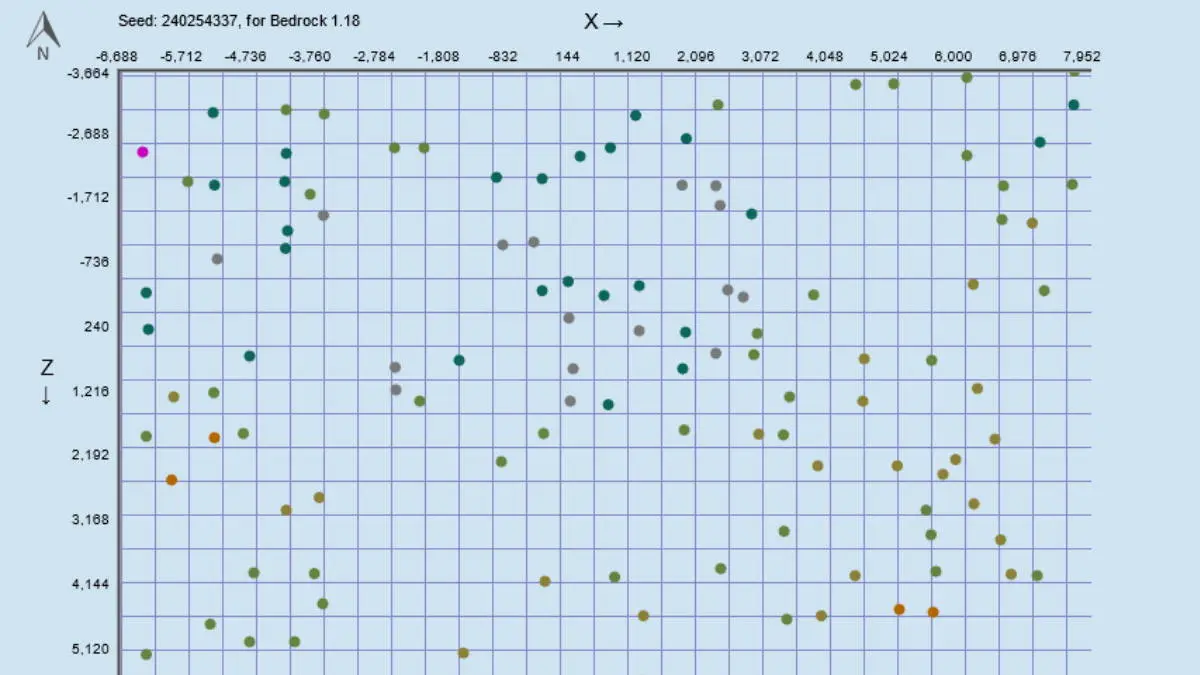
Once you’ve got your world’s seed, it’s time to input it into the Chunkbase Village finder. Head to the website we linked, then input your seed in the box. From the version dropdown menu, be sure to select Bedrock 1.18, assuming you’re using the latest version of Minecraft: Bedrock Edition.
You should see colored dots pop up all over your map if you’ve done everything correctly. Each dot represents a Village, and you can hover over each one with your cursor to get the exact coordinates. Enable coordinates in your world, and you should be able to get to the Village easily from there by cross-referencing.
Each color represents a different type of Village:
- Pink: Zombie/Abandoned Village
- Orange: Desert Village
- Green: Plains Village
- Sycamore: Savanna Village
- Deep sea green: Taiga Village
- Gray: Snowy Village
Now you can find any Village with relative ease! If you have any other questions, please let us know in the comments below!








Published: Feb 3, 2022 10:36 pm